Updated on: December 31, 2024
Short on time? Click on one of the links below to skip straight to the troubleshooting steps:
There are a few different reasons why Gmail messages will display the “Be careful with this message” banner, both in your inbox and in emails you send to others. If this is happening to you, there are things you can do to troubleshoot the problem.
Read on to find out more about why Gmail flags some emails (and not others) and how you can fix the issue. And note that the best way to protect yourself from genuinely dangerous emails is by using a good antivirus with real-time malware protection, like Norton.
Try Norton (60 Days Risk-Free)
Why Do I See “Be Careful With This Message”?
The short answer is that it’s impossible to know exactly why Gmail flags some emails with this banner. However, there is usually more detail provided within the banner, such as:
- Gmail could not confirm that it actually came from [domain].
- This may be a spoofed message.
- [Name] has never sent you messages using this email address.
Gmail hasn’t disclosed its exact spam/malicious email detection logic — this is almost certainly so that hackers can’t use the information to bypass Google’s filters. However, we do know a few things about Gmail’s email filtering technology.
When you send or receive an email, that email travels through Google’s proprietary spam filters before reaching an inbox. There’s no way to turn these filters off, which is a good thing. If Google deems an email that passes through them to be suspicious, the email will either be marked with the “Be careful with this message” banner, or sent to Gmail’s spam folder.
These filters are really important because email is a common vector for cyber attacks of all kinds, including:
- Spear-phishing — Malware, exploit, or phishing attacks sent to a targeted recipient.
- Malspam — Malware, including ransomware, trojans, and spyware, delivered via email.
- Link phishing — Emails disguised as a trusted organization containing links to malicious websites. These websites will steal your information or force you to download dangerous files.
- Exploit attacks — Emails containing code that can find a security flaw in your computer, such as an out-of-date OS. The malicious code will use this exploit to open a backdoor into your system and spread malicious files or steal information.
- Man-in-the-middle attacks — Attacks where hackers intercept emails between trusted organizations or people. The attackers can use the intercepted email to steal information or spy on those involved in the email chain.
You can learn more about the common types of email-based attacks further on in this article.
If you’re trying to protect yourself from email attacks, you should download an antivirus program instead of just relying on Google’s finicky email filters. For example, Norton 360 has real-time malware scanning, which can prevent malspam attacks, and its Safe Web browser extension blocks phishing links and malicious sites that can perform exploit attacks. Plus, Norton’s firewall can block hackers from accessing your network to design spear-phishing attacks.
“Be Careful With This Message” Is Appearing in Emails I Receive
Short on time? Here’s what to do if you see “Be careful with this message” in emails you receive:
- 1. Check the Email Sender. Ensure the email came from someone you know or from a trusted business domain. Look out for spelling errors in trusted business domains. If you have the trusted sender saved in your address book, email them separately and ask them if they sent you an email. If everything appears to be in order and you’re confident the email is legitimate, click Looks safe, and the banner will disappear. If not, move on to step 2.
- 2. Report the email. You will see a button on the banner to report the email — usually it will say Report spam or Report phishing. Clicking this button will move the suspicious email into your spam folder and alert Google’s abuse team to help thwart similar attacks. The email will automatically delete after 30 days, but you can also delete it manually.
- 3. Scan Device. If you’ve downloaded an attachment from the email, run a full disk scan with a high-quality antivirus (Norton is the best).
Step 1. Check the Email Sender
First, you need to determine whether or not the email is from a trustworthy source. However, it’s important to double-check before you decide that you recognize an email address.
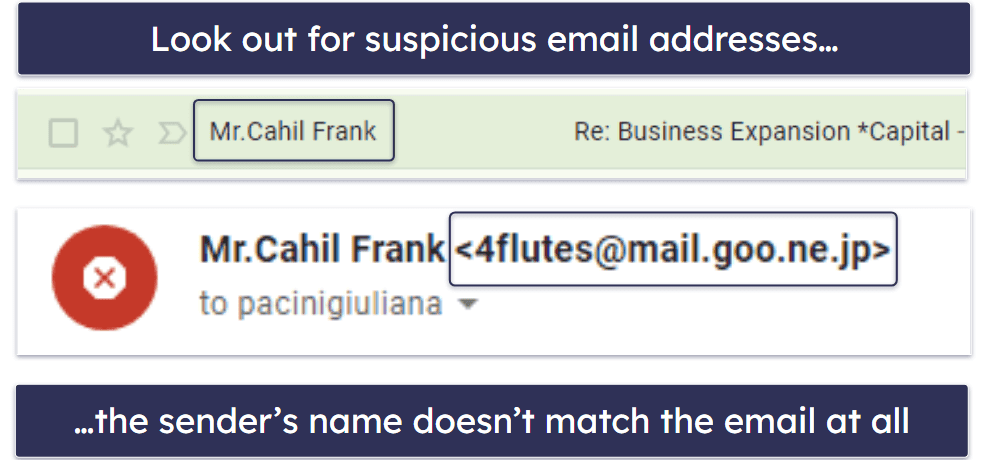
Sometimes hackers will disguise their email to make it look like it’s coming from a trusted business or person. You should check for spelling mistakes in the email address. One strategy hackers use is to replace a character in the address with a similar-looking one, such as using the numeric “0” in place of a capital “O” or a lowercase “l (L)” instead of a capital “I (i).”
Other irregularities you should look out for in email addresses include:
- Fake sender name.
- Domains coming from countries you’re not affiliated with.
- Emails from businesses you haven’t subscribed to.
- Emails from domains you haven’t heard of.
Fake sender names are an incredibly common tactic, and they don’t require a ton of hacking expertise. Hackers can spoof an email so that it looks at first glance like you’ve received a message from, say, Amazon Fulfillment. However, when you look more closely, the sender’s email address is something like Ama.z0n.ful@hotmail.com (which is not a legitimate Amazon email address!).
In these situations, you should open the email. The sender’s real email address will always be displayed in non-bolded text above the subject line of the email:

Also, while you have the email open, look for suspicious signs in the email’s body content, such as misspelled names and other spelling mistakes. In the example above, the sender assured me he was representing a large corporation “made up and funded by indigenous i n v e s t o r s and Lenders”. This is not a legitimate business expansion opportunity (unfortunately).
Remember: Banks, social networking sites, and government institutions never contact you for sensitive information via email.
If you’ve completed the steps above and the email looks like it came from someone you’ve corresponded with before, there’s one final check you can complete for absolute certainty:
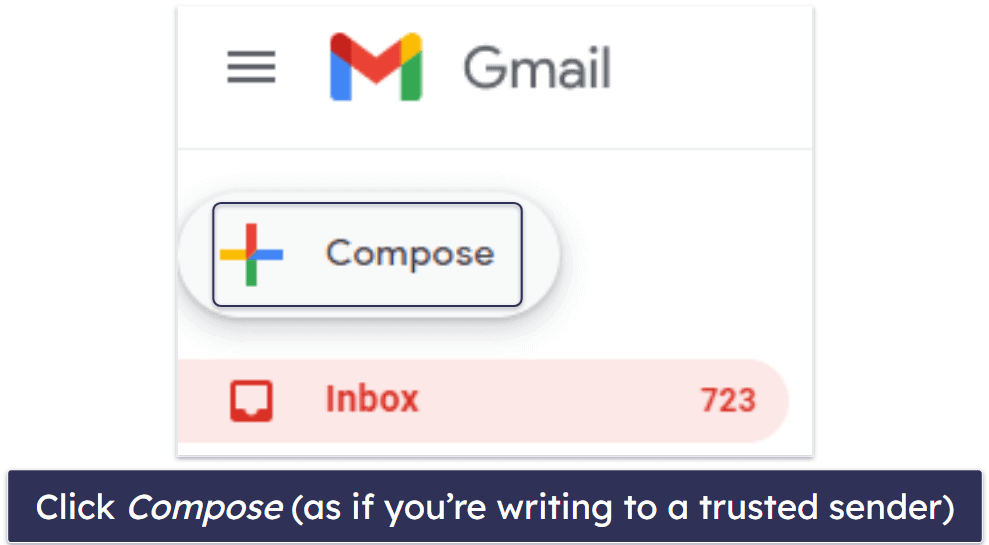
- Select Compose in the top left corner of your Gmail window.

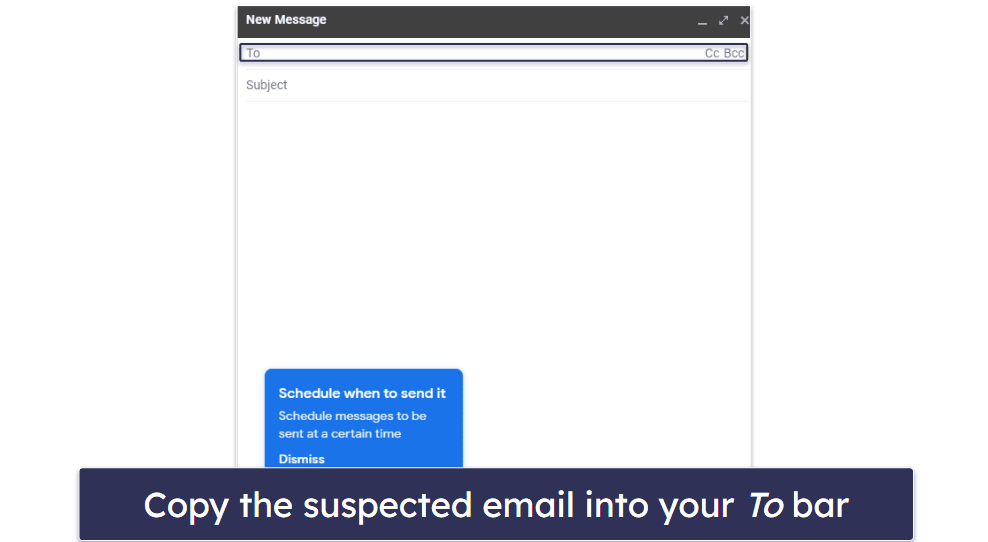
- Copy the suspected email address into the To bar.

If the address matches a trusted sender you’ve corresponded with before, their email will appear in a drop-down list. If nothing appears, or the emails that appear in the drop-down list don’t match, then the chances are you’ve received a fraudulent email disguised as being sent from a trusted sender.
It’s important to know that legitimate senders can still send you malware if their email has been hijacked. If you’ve completed all of these checks, but you’re doubtful of an attachment or link a trusted correspondent has sent you, it’s best to contact them outside Gmail and ask them directly if the email came from them.
Once you’ve completed all of the checks above, if you’re happy with the email, click Looks safe, and the “Be careful with this message” banner will disappear. Eventually, Gmail’s AI will learn that you trust this sender, and it will stop showing the banner.
Note: Sometimes Gmail won’t give you the chance to click Looks safe. Instead, it will simply say, Delete, or nothing at all. On these occasions, Gmail has determined that the email is malicious. If you’re still sure it’s safe, you can open a support ticket with Google to troubleshoot the issue.
Either way, if you don’t trust the email, don’t click on any links in the email, don’t download any attachments, and don’t reply. Instead, continue to step 2.
Step 2. Report the Email
There are two ways of reporting the email. The first way is to click on the reporting option given on the banner, which will usually say Report phishing or Report spam. However, if this option doesn’t display, the alternative way is to press the three vertical gray dots in the top right corner of your inbox. Then, in the drop-down list that appears, click Report phishing.
Note: If Google already knows about the malicious email, the banner will have a Delete button that you can press instead of reporting the email.
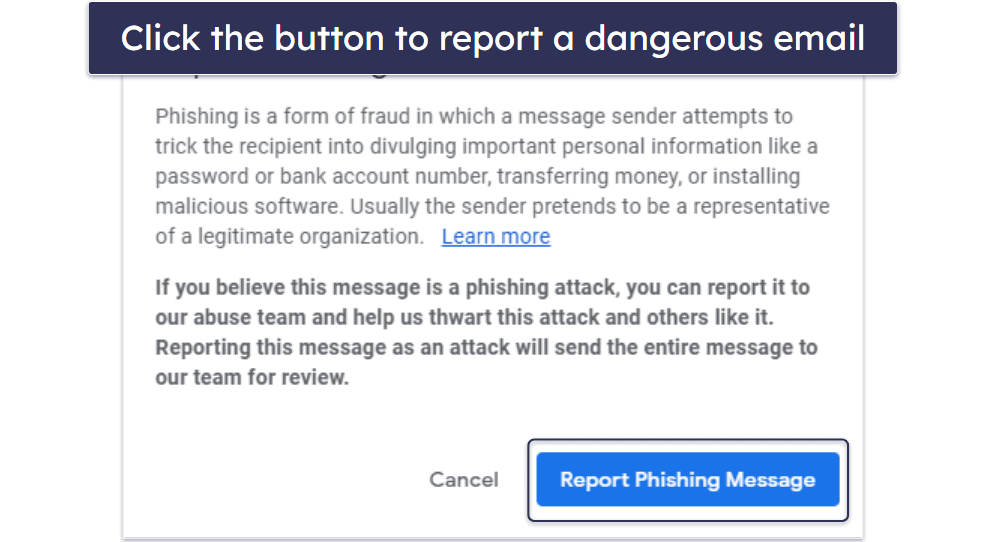
No matter how you report the dangerous email, Gmail will display a box asking you to confirm your choice.

When you click on the Report Phishing Message button, this will automatically move the suspicious email to your spam folder and alert Google’s abuse team, which will help prevent future phishing attacks. You can then delete the email or leave it in your spam folder, and it will delete automatically in 30 days.
If you downloaded an attachment from the suspected email, move on to Step 3.
Step 3. Scan Your Device
IMPORTANT: Do not connect your cell phone, tablet, or USB drive to your computer if you suspect you’ve downloaded a malicious attachment. In doing so, you risk the contained virus replicating itself onto those devices.
Download an anti-malware suite. You can check out our top antivirus list here (Norton 360 is my favorite, and Avira has an excellent free option). Once you’ve downloaded a secure antivirus program, run a full disk scan on your computer.
Even if you know where the attachment downloaded to, a full disk scan is best. Some malware can replicate itself in hidden locations or infect your system registry as soon as you download it.
A full disk scan will detect, quarantine, and remove every copy of the malicious attachment you downloaded. It will also ensure that your device isn’t infected with any other malware, including spyware, rootkits, or worms, which can often run undetected.

Remember: Run the full system scan until it’s finished. DO NOT cancel the scan when you see the malicious attachment appear on the infected file list. There’s no way of knowing how many other copies of it exist in your system.
The full scan can take anywhere from 1–4 hours, because your antivirus needs to analyze every single file and process on your computer. When your antivirus has alerted you that the scan is complete, every instance of malware on your system will be identified and quarantined.

“Be Careful With This Message” Is Appearing in Emails I Send
Short on time? Here’s what to do if your recipients are seeing “Be careful with this message” in emails you send:
- 1. Clean Up Your Email. Remove unnecessary links, images, and attachments. Also, check to make sure your email is well written. Gmail’s spam filters can pick up on grammar and spelling mistakes.
- 2. Set Up Email Authentication. SPF, DKIM, and DMARC authentication methods help prove to ISPs and mail services that you’re authorized to send email from a particular domain.
- 3. Scan Device. Use an antivirus like Norton to scan the files you’re sending and make sure those files aren’t infected. It’s also possible malware installed on your system is hijacking your email to spread viruses to addresses in your network.
Step 1. Clean Up Your Emails
Your recipients may be seeing the “Be careful with this message” banner on an email you’ve sent for a few different reasons. For instance:
- Too many recipients (this banner often appears on chain emails).
- Bad grammar/punctuation.
- Too many attachments.
- Too many images.
- Too many hyperlinks.
- Your email address is in a database of suspicious emails.
- You haven’t set up email authentication.
- The device you sent the email from is infected with malware.
If you’re sending from a business domain, the warning might appear because:
- The email hasn’t got an unsubscribe button (or link).
- You have the same domain in the “From” and “To” fields.
- Your “Reply to” email address is different from your “From” address.
Google automatically flags emails that meet these criteria as a way to protect users from phishing links. If this is the case, you can try removing images, links, and attachments and make sure there are no simple mistakes in your email.
If you’re sending emails with a design element, there might be some code in your email template that is causing your messages to be marked as risky. Have a play with the content in your template, removing items and sending test emails to see when the warning appears and when it doesn’t. You might find the source of the problem this way.
If you’re sending business emails to a mailing list, it’s a good idea to turn off Reply Tracking, as this can trigger the warning. It’s also important to check your bounce and complaint rates. You should keep these as low as possible by immediately removing any addresses for which you received a bounce or a complaint from your database.
You could also try sending the email to fewer people, or use Gmail’s blind carbon copy (BCC) function. Using BCC will hide recipients’ email addresses from one another and lessen the chances of your email being flagged by Gmail, as you won’t be spreading personally identifiable information (PII).
Step 2. Set Up Email Authentication
SPF, DKIM, and DMARC are email authentication methods designed to prove to ISPs and mail services that you’re authorized to send email from a particular domain. Verifying your account with SPF, DKIM, and DMARC is really important, as Google recommends using all three methods for authentication.
Here’s a quick summary of what each record does:
- SPF (Sender Policy Framework) — Specifies the number of domain IPs allowed to send email from your domain.
- DKIM (DomainKeys Identified Mail) — Ensures emails going from server to server aren’t interfered with by anyone in the middle, and the email can be identified at the receiving end.
- DMARC (Domain-based Message Authentication) — An extra layer of validation that matches the validity of the SPF and DKIM records. You can receive DMARC reports if email validation fails.
To check which email authentication methods you already have set up, and to add more methods as needed, you’ll need to go into your DNS settings. The exact processes will vary depending on which email service you’re using, so follow the instructions given.
Once you’ve followed all the steps and your email content is clean, send the email to yourself — and only yourself — before sending it to its desired location, to check that the banner no longer appears.
If the banner is still appearing to your recipients when you send email, it’s possible your device may have been infected by malware. In that case, move on to step 3.
Step 3. Scan Your Device
Once you’ve downloaded a secure antivirus program, run a full disk scan on your computer.
Viruses and other malware can take control of your device and send themselves as attachments to other users in your network. These users will often download and run the attachments they get from your device, because they trust your email address.
Running a malware scan will enable you to stop the virus from hacking your emails, and can also let you know what kind of malware is on your device. This way, you can help keep your email recipients safe by warning them about the specific risks they’re facing.
If you detect malware, or someone in your network notifies you that you’ve been sending suspicious links or attachments, make sure you check your Sent folder. Then you can notify other people in your network to disregard your previous hacked emails.

Remember: Run the full system scan until it’s finished. DO NOT cancel the scan when you see a virus appear on the infected file list. There’s no way of knowing how many other copies of it exist in your system, as malware can replicate itself and hide all over your disk.
The full scan can take anywhere from 1–4 hours, because your antivirus needs to analyze every single file and process on your computer. When your antivirus has alerted you that the scan is complete, every instance of malware on your system will be identified and quarantined.

One additional thing to note: While it’s important to have a high-quality antivirus to keep your device safe, some antiviruses add an automatic signature to your emails, confirming that they are virus-free. Strangely enough, these signatures can actually lead to your emails being flagged as spam! So make sure to disable this feature if you’re still having issues with your emails being flagged.
Common Types of Email-Based Attacks
Emails are one of the most common tools used for cyber attacks, and while many email clients like Gmail have built-in spam filters, they can’t protect you from every email-based threat.
Through email, you can fall victim to the following attacks:
Malspam
Malspam is the general term given to malicious files spread over email in the form of attachments. This is one of the most common ways for malware to spread. According to a CSO study, 94% of malware is delivered via email.
Through malspam, your computer can become infected with:
- Trojan Horses — Legitimate-looking files that steal or modify data on your computer.
- Computer Worms — Viruses that replicate themselves on your computer, drain your CPU, and modify or delete files.
- Ransomware — Locks and encrypts files on your PC. Often, the hacker will ask for money before the files are unlocked.
- Rootkits — Allow hackers to take control of your computer remotely.
- Cryptojackers — Hide from the user and silently steal their cryptocurrencies.
- And more…
Link Phishing
Phishing emails trick users by pretending to be official messages from a reputable company, when in fact they contain links leading to harmful phishing websites. These websites are specifically created to get your personally identifiable information (PII) and financial details.
Cyber criminals often disguise themselves through phishing emails posing as popular websites like Netflix, threatening account deactivation unless you provide your payment details. This kind of attack is so common that Netflix even has a dedicated page to help users avoid falling for it.
Spear-Phishing
Spear-phishing attacks are email attacks which target specific recipients. Hackers research a victim’s networks, software, company procedures, and more in order to ensure that their malicious payload hits its mark. That means the malicious email will be easy to fall for and that it contains specific malware and exploits to target your systems.
Spear-phishing is usually directed at high-value targets, like corporations, banks, and executives. In fact, even Google and Facebook have fallen for this email scam. Between 2013 and 2015, a dummy corporation built by hackers sent spear-phishing emails to financial executives at both companies, tricking them into wiring around $100 million for falsified services.
Man-in-the-Middle (MITM) Attacks
A MITM attack happens when a hacker inserts themselves into the communication between two trusted sources, without being detected by either of those sources. These sophisticated attacks can be used to eavesdrop on conversations, or even to intercept and alter communications between two users.
For example, in 2019, an Israel-based startup lost $1,000,000 of seed funding when a MITM hacker altered the emails between the startup and a venture capital company in China. The VC company and the startup thought they were communicating with each other, and the Chinese company wired the funds to what they thought was the startup. However, the entire conversation had been extensively rewritten by the attacker, and the wire transfer was actually sent to their account.
You can find out more about MITM attacks here.
Anti-Malware Software Can Protect You From Email-Based Attacks
The top antiviruses on the market in 2025 provide real-time threat protection that can detect malware files before you download them. They can also block and prevent exploit-based network intrusion with powerful firewalls and host-intruder prevention systems (HIPS). While no security solution is 100% secure, you can significantly increase your chances of staying safe online by downloading an anti-malware solution.
Frequently Asked Questions
How to fix “Be careful with this message”?
If you see “Be careful with this message” in emails that you send, you may be a victim of malware. Alternatively, your email may have unnecessary clutter in it that Gmail is flagging. Either way, you should follow our steps to remove “This message seems dangerous” and download a good antivirus such as Norton 360 to protect yourself from future threats.
However, if the banner appears in emails that you receive, you should take a look at the sender and see if you recognize the address. Be warned that hackers will often disguise their email to impersonate a trusted business or person. There are several common-sense techniques which can help you determine a sender’s authenticity. You can read about them in the steps listed above.
If I see “Be careful with this message,” does that mean the email contains a malicious link?
Not necessarily — Gmail flags messages for a variety of reasons. However, if you’re in any doubt at all, you shouldn’t take risks. If you don’t recognize the email sender, don’t click on any links. Instead, report the email as phishing. This will alert Google’s abuse team and move the email to your spam folder.
What do I do if I download an attachment from an email displaying “Be careful with this message”?
If you download an email from an attachment displaying “Be careful with this message,” you may be a victim of malware, especially if you don’t recognize the sender.
In this situation, you should scan your computer for viruses using a good antivirus suite such as Norton 360. If the attachment you’ve downloaded is malicious, Norton 360’s malware scanner will scan your disk and find any instances of it. It will then quarantine the file and any other malware it finds.
Norton 360 also has real-time protection and a firewall, which will stop you from downloading any future attachments that contain malicious files.